
Doodling
June 13, 2014 Works for me. "Undead and Unemployed" by MaryJanice Davidson ♦♦♦♦◊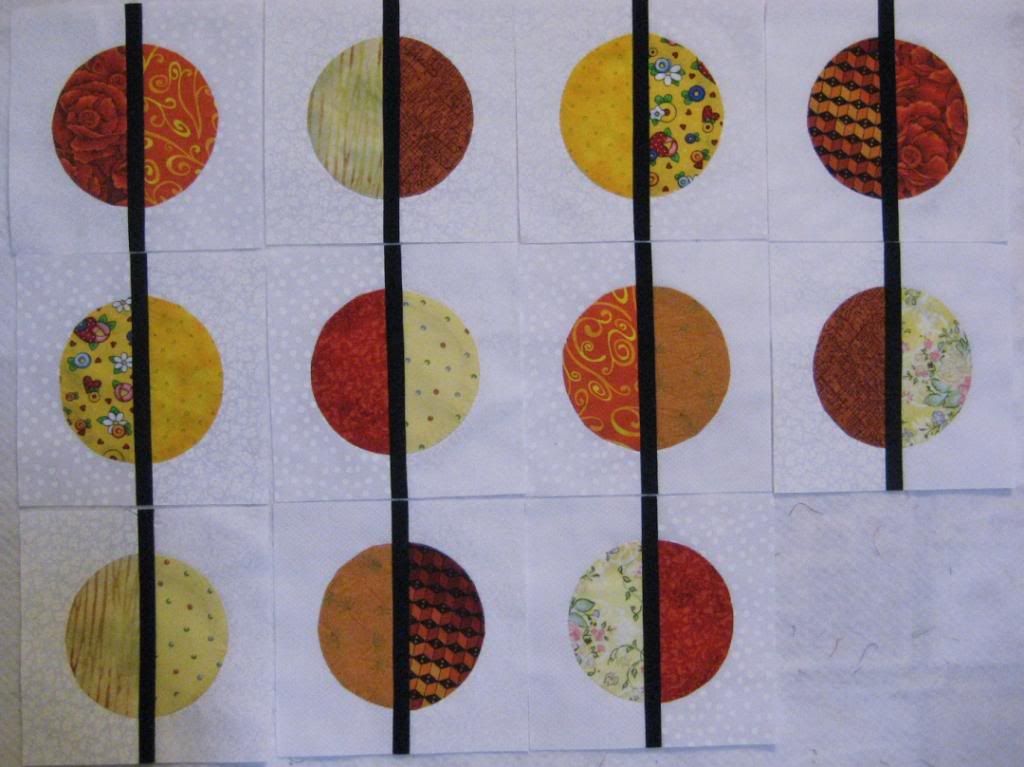 First off, let me remind you that I finally joined and submitted blocks to Block Lotto - I told you about it in my last post, which was way 'back in February. I was so fired up about these blocks and I was so determined that I would win (random draw - so I had SO much say in the matter!). But whaddaya know - I won!
I won! I won! Thirty-six quilters worldwide made 224 Bead on a String blocks; five were picked as winners and I was one of the winners!! I don't quite remember how many blocks I got, but it was in the neighborhood of 45... I think the block(s) that came from farthest away were from South Africa.
All (or almost all) of the blocks were great and I am thrilled with the different fabrics everyone used. Everyone included some sort of congratulatory note (which was fun in itself) and many wrote their notes on postcards - some indicating where they were from, some 'just' artsy-fartsy.
The blocks are in their own corn dog box now. Just this morning I saw this blog post where Jane has come up with a great Flying Geese medallion block for a regional bee in Australia and New Zealand - neat block/medallion, for sure, but what got me was the possibilities it opens up for using my lovely Bead on a String blocks. I'm sharing it with you, but mostly so I can find it again when I grab this corn dog box!
So what does that have to do with doodling?
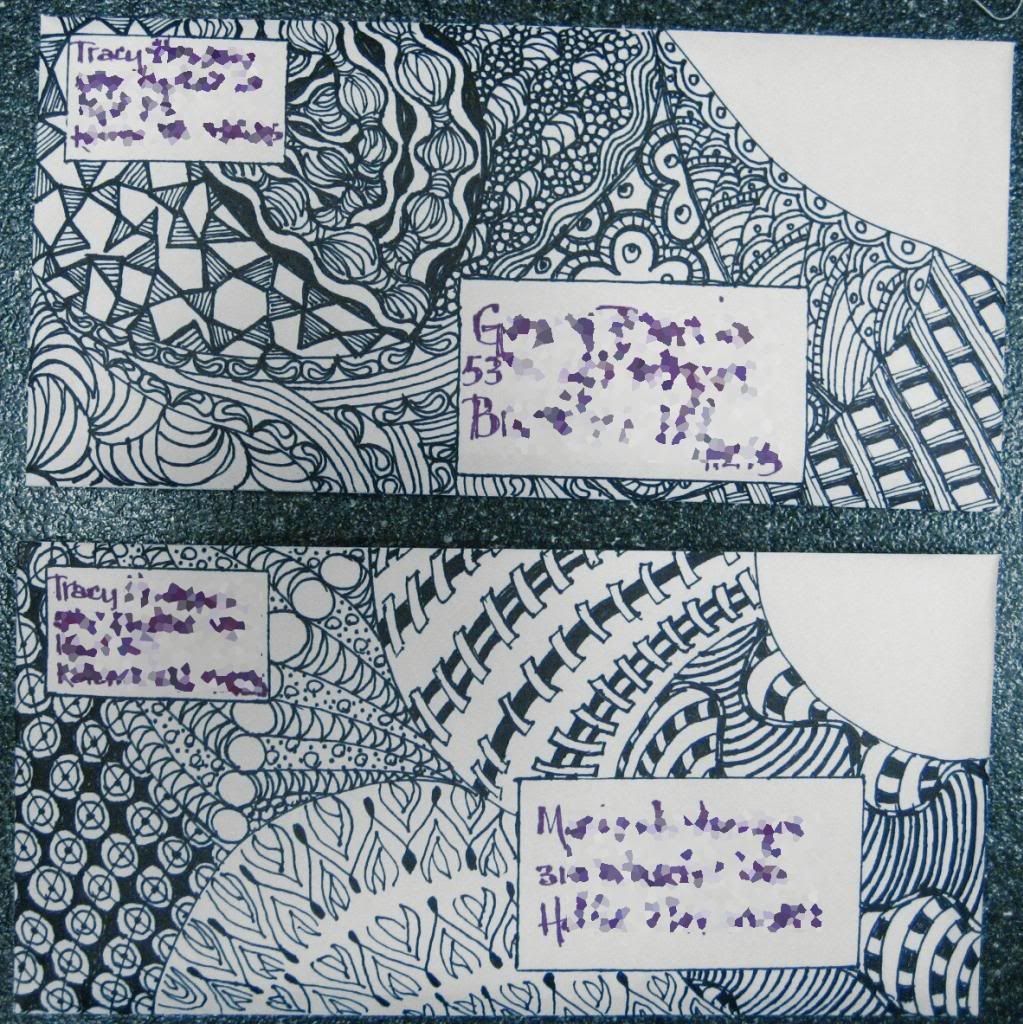
This.
I chose to keep a couple of the Bead on a String blocks that I made and send some to other winners. I don't have cool postcards to share (I didn't know that's what was done), but I doodled on the mailing envelopes.
It's pretty fun. I use an extra-fine point Sharpie pen; each one of these envelopes took an evening. I found that my hand got a bit crampy or stiff after doing an entire envelope, so there's no production line happening here.
Yes, I was inspired by Zentangles though I guess there are 'official' Zentangle patterns and everything else is just doodling. I'm okay with that.
I've done a few more envelopes for other people, too. Just this week I picked up a new book from the library, The Art of Whimsical Lettering (Amazon link), and have been inspired even further in the ink-to-paper (or fabric) department. I hope that I'll have more to share with you as I experiment more!
permalink 0 folks clicked here to comment


A Corny Resolution List
January 23, 2014 Abandoned book "Rumpole and the Penge Bungalow Murders" by John Mortimer ♦♦◊◊◊If you've ever actually sewn with me it's no surprise but to everyone else - have I mentioned that I store projects in empty corn dog boxes? This year my goal is to empty out the corn dog boxes. You see, none of them are labelled and they're all over the place, tucked in corners and stacked on shelves and buried under whatever that is back behind my sewing table.
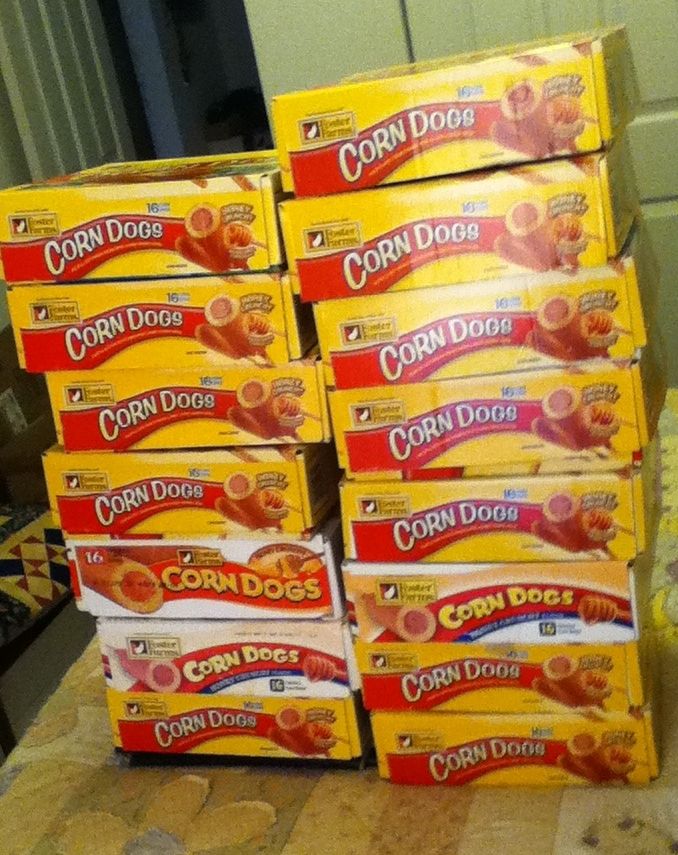
This is what I found in my first search for boxes. SIXTEEN of them.
Since then, I've discovered another box and there's that mountain of "stuff" back behind the sewing table that may be harboring more of the little devils.
The goal is to just grab a box and work on whatever's in it until it's finished. I haven't inventoried the projects at all, and I did find that one of the boxes here have the leftovers from a finished project so they just need to find a home.
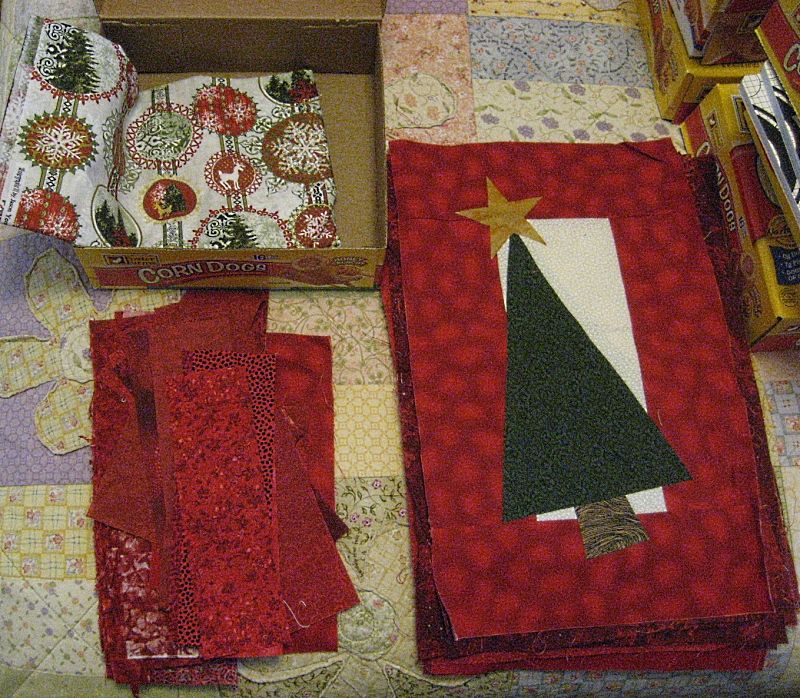
Here's what is in the first box I grabbed.
The blocks and coordinating fabric for the Oh Christmas Tree block swap I hosted for my forum friends at least a year ago, but probably two. Or three. (ack! I just noticed that the Search box at the top of my blog is gone. Bummer.)
Let the fun begin!
By the way, I won't be storing empty corn dog boxes as I complete the projects. I have plenty of other UFOs that can be stored in them; I'll just be sure to mark them when I refill them so I don't get them mixed up. It would probably be a good idea to label the boxes with what's inside, but I'm not going to get carried away or anything...
Labels: craft, quilting, sewing
permalink 7 folks clicked here to comment
Further Crayon Adventures
February 14, 2013 Abandoned book "The Crock of Gold" by James Stephens ♦◊◊◊◊Part one of my crayon adventures reminded you of my addictive personality (aka, Take An Idea and Run With It)... then I wrote out the steps that I took to create the crayon "masterpieces".
I've given a 'trunk show' and talk about the crayon experience. I've also taught three or four how-to classes. Each time I teach a class, someone comes up with a new way to use the crayons and I come up with a way to make the crayon more colorfast.
In the 'how-to' post I showed before-washing and after-washing pictures. What I learned, though, in my very first class was that the pigment could rub off onto other fabric. This is not a good thing! Imagine taking a crayoned quilt off the shelf, unfolding it and finding smudged pigment! Now, the stuff that was rubbing off (scrubbed with a clean piece of muslin) was from unwashed projects but still. I found that most colors could be smudged if I really worked at it, but the bright reds didn't take much effort. Ouch.
Since I have a little bit of experience with acrylic paints on fabric, I dug out some of the product that I mixed when painting. I tried over, under, before ironing, after ironing - pretty much all of the combinations I could think of. I found success with a Brush & Blend product and good old Textile Medium. Actually the B&B won out by such a small margin that only someone who is as detail oriented as I would notice the difference.
So, an addition to the "how to": After ironing your project, use a paintbrush (I haven't tried a foam brush, but it strikes me there would be bubbles) and lightly but evenly paint over the pigment. Let dry naturally.
If I'm doing a wallhanging or something else that won't come into rough contact with other fabric, I probably won't bother with the painting treatment.
Here's a sneak peek of the project that I'll be teaching at the Rainy Daze Quilt Guild in Centralia (WA) in March. They're called Pin Wheels and these are four of the six designs I'll be bringing to the workshop...
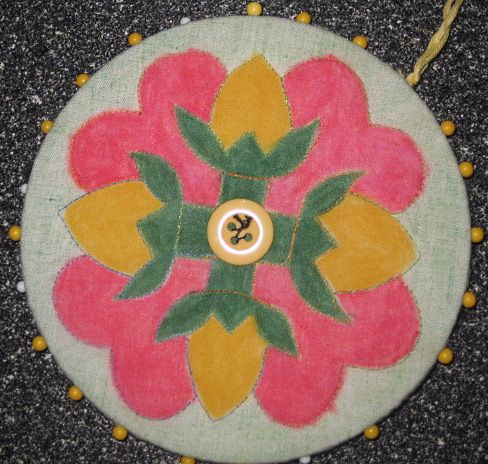 ..........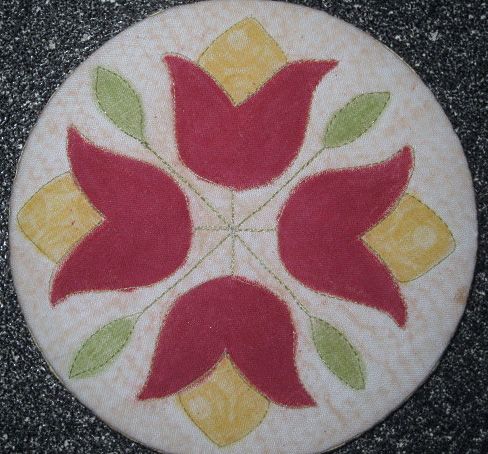
A couple of traditional designs, with (in my mind) the flavor of Baltimore Album-type applique.
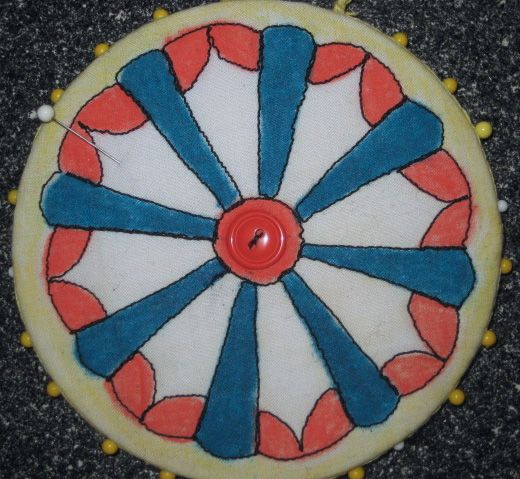 ..........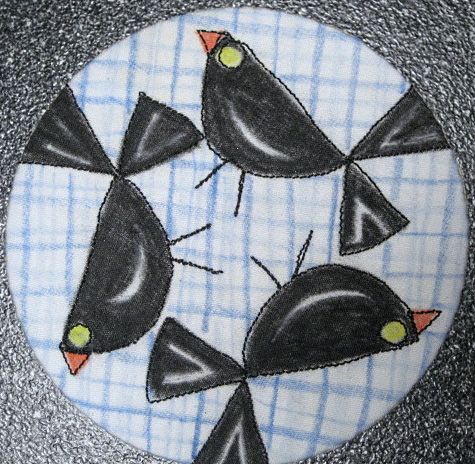
A Dresden Plate variation and cute little Dorothy Gale Blackbirds :-)
The two on the left are actually two sides of the same Pin Wheel. You can see where I've stuck straight pins around the edges. This is a great way to carry pins when you're going to classes or just taking some handwork on the road. The designs themselves are lightly padded (and quilted) so there's a little bit of layer to stick your needles in the 'face' of the Pin Wheel. These have been treated so that the pigment doesn't rub off in your project bag.
This isn't a new and groundbreaking craft. I've seen it in a number of new and antique variations in library books and on the web.
Wouldn't these be great gifts?
Oh, and Happy Valentine's Day, everyone. Today is the 22nd anniversary of the day Mr. W. and I said, "I do" in a video chapel in Hollywood (and his mother said it wouldn't last). I can't speak for ol' Eeyore, but I'm pretty pleased to still wake up next to him every morning.
Labels: craft, quilting, sewing
permalink 0 folks clicked here to comment
Meet Veronica
September 28, 2012 Then my great-grandfather was gone, before I could ask him which vampire he meant. "Dead and Gone" by Charlaine Harris ♦♦♦♦◊
Yes, ladies and gents, you've waited over a year for this event and now it's here! Presenting the one, the only, the sparkliest of the sparkly chickens, (cue big music)
VERONICA!
VERONICA!
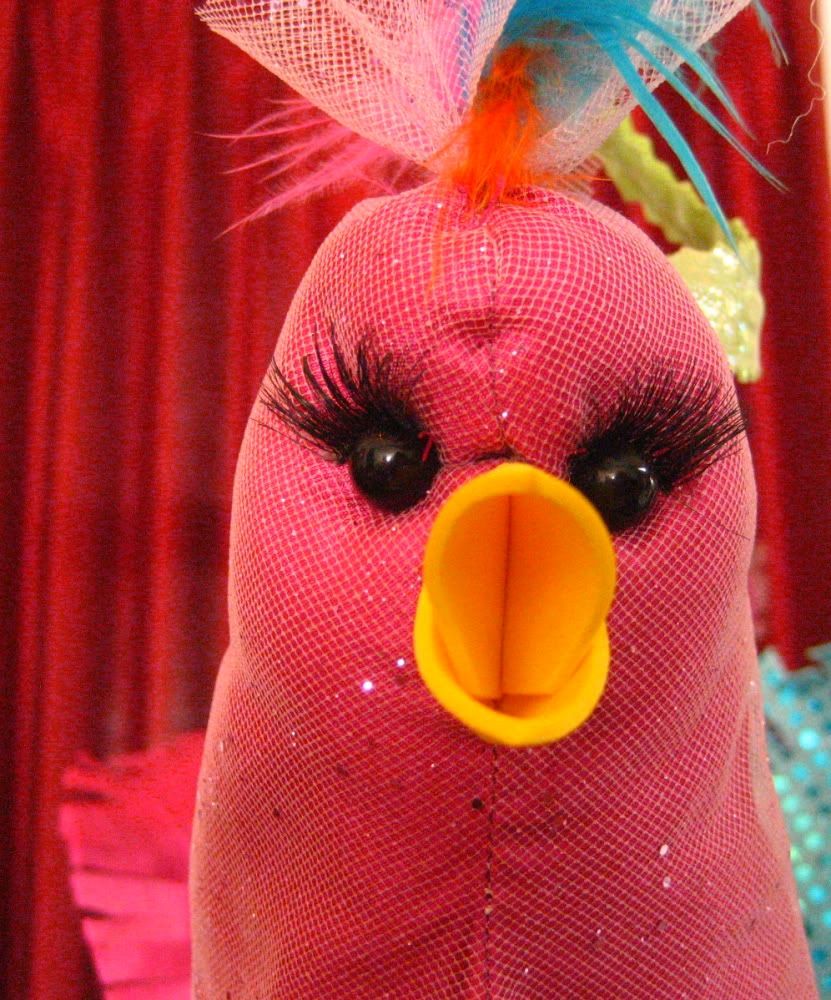
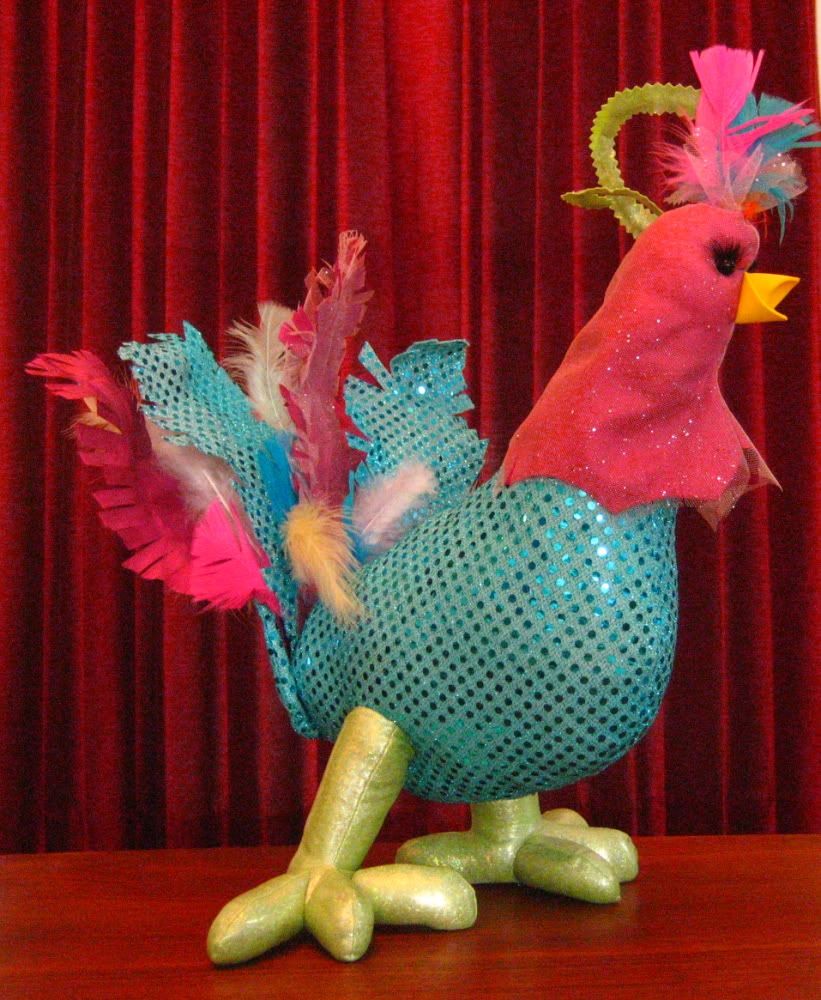 Standing approximately 18" tall, including that stunning plumage, Veronica is a gorgeous example of a 10-penny chicken.*
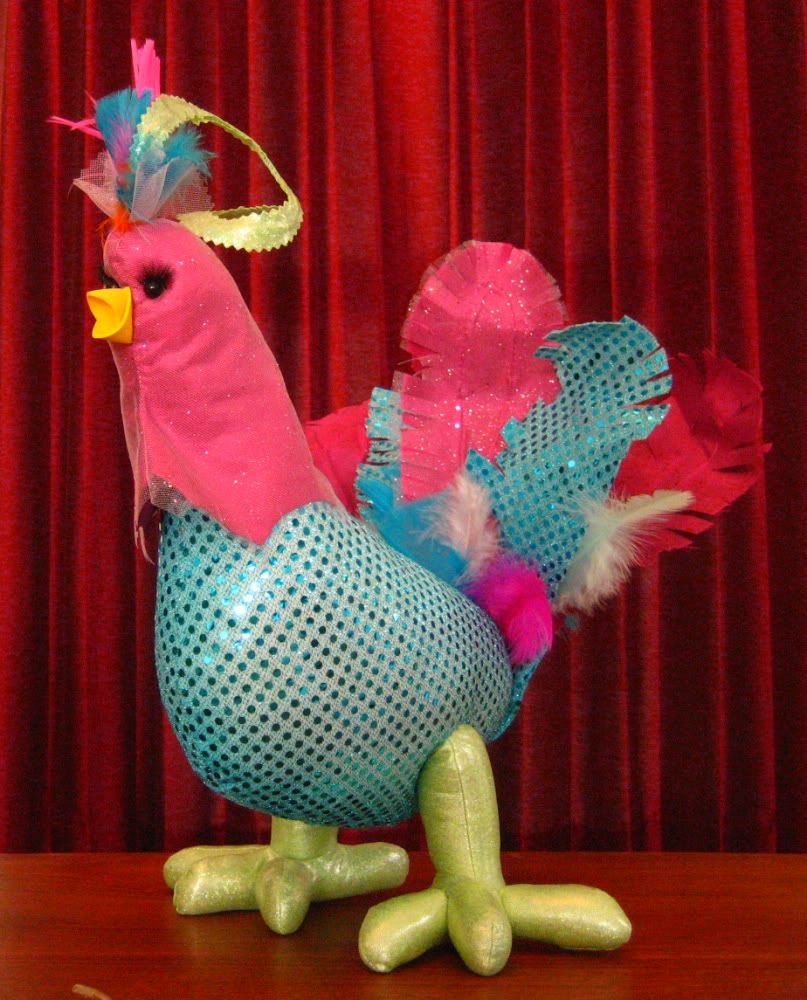 Curvy in all the right places - am I right, men? - Veronica is still an athletic gal, ready to run through a room at a moment's notice.
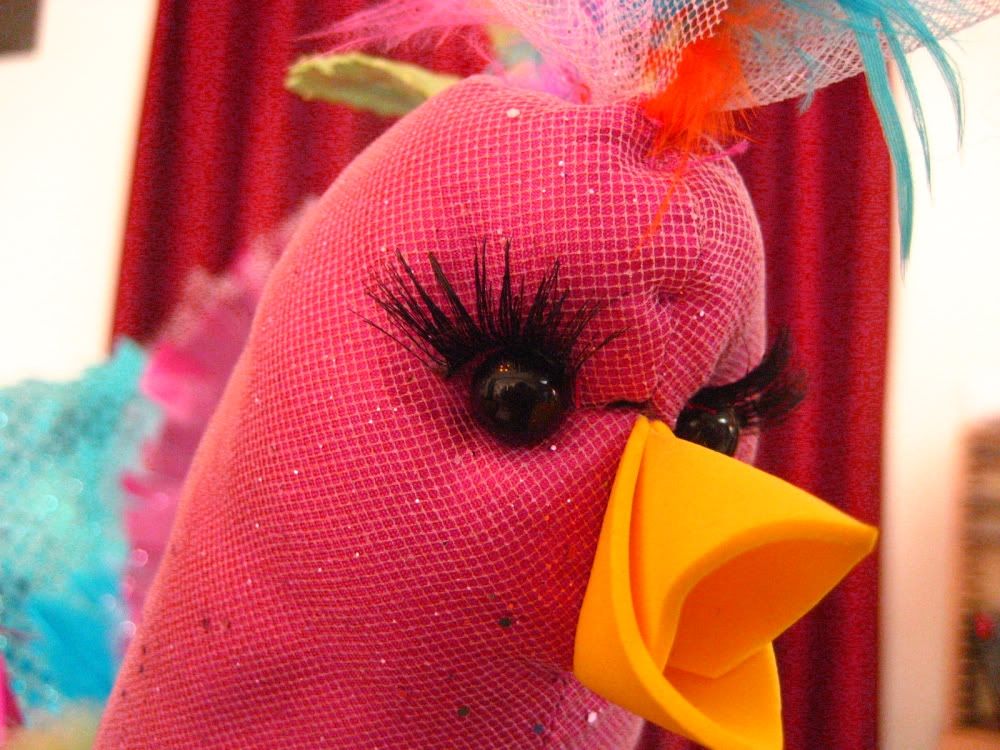 But don't let Veronica's shapely sparkle distract you. Look into those lovely eyes and see the deep compassion and willingness to help anyone who needs a reason to change their focus at the bat of an eyelash.
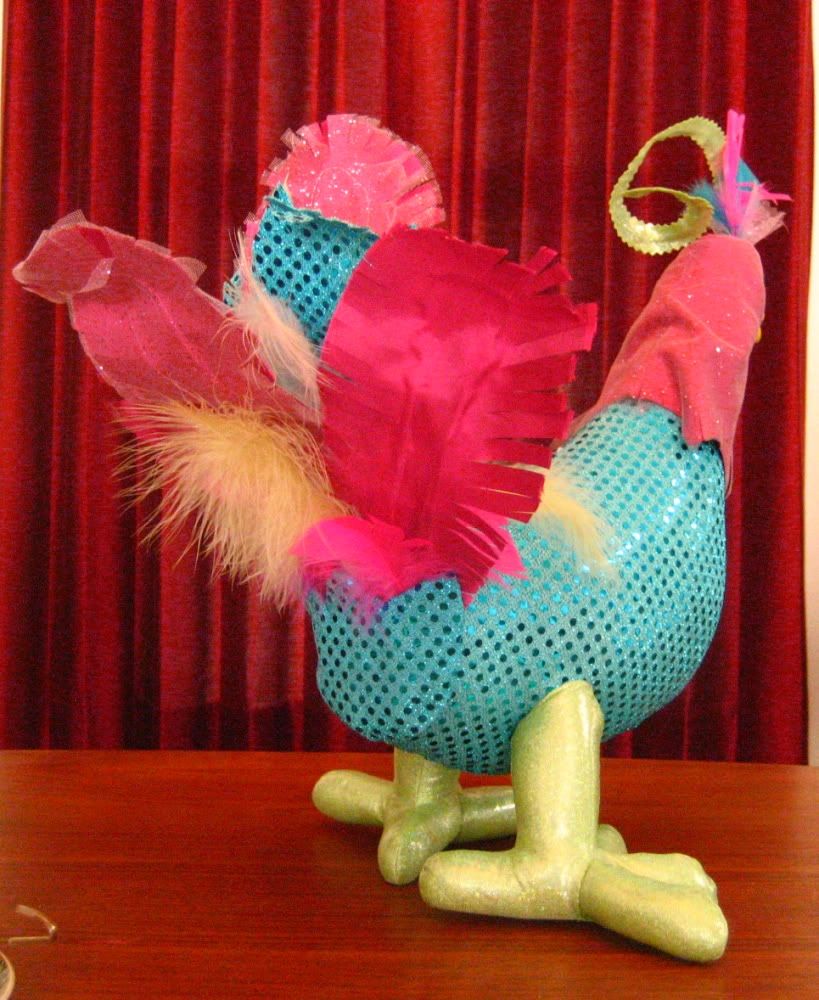
Thank you, Veronica, for allowing us to be in your presence to experience your grace, your beauty and most of all, your compassion.
Give it up, ladies and gentlemen, fooooooorrrrrrrrrrrrr Veronica!
*A 10-penny chicken: A front/top-heavy chicken who needs some "junk in the trunk". Veronica required an augmentation of 10 pennies to avoid falling on her beak.
Labels: craft
permalink 2 folks clicked here to comment
The Blogoversary That Wasn't, Part Two
February 28, 2010Hi again, everyone! We've made it to Sunday midnight, so this giveaway is closed. I'm toddling off to bed, but I'll be back tomorrow to draw a winner and add to the CLICK-FEST - Stay tuned!
It was really as simple as that. "Lightning" by Ed McBain ♦♦♦◊◊
Wow! What a fun response already to The Blogoversary That Wasn't, Part One - I'm finding all kinds of new-to-me blogs to explore and rediscovering some that I've haven't visited in a while!
As of this writing, it looks like Crispy is "stuffing the ballot box" - there a number of new visitors that said, "Crispy sent me" (but no Bertha, so far) so that means an entry for the new visitor and an EXTRA entry for Crispy... !
I've started a draft blog post titled "Cleaning Out the Photo Albums". It seems that I take (and upload) pictures but don't always get around to sharing them with you. Whoda thunk, eh?
As promised yesterday, here's a little something I made back in December:
 It's a trivet, of all things!
Susie (my boss) gave a little crafty class at the shop in December showing how to make a set of four coasters - but since I have rules about coasters*, I chose put them all together to make a trivet, instead.
We used inks, chalks, acrylic paints, rubber stamps... oh, I don't know, pretty much anything that will leave a mark!
And other than the fact that I put all that color & design on my trivet, what is the big deal about it?

Yep. It's made from dominoes. How much fun is THAT??
Of course, after the fact - after I was done painting & fluffing and then sprayed it with a gloss polyurethane varnish to seal it, I had an awful thought: What if the sealant isn't heat-proof? What if I set a hot pan on the trivet at the table and it sticks to the trivet??? (Of course, now that I've looked it up to link you to the Wikipedia page, I see that I'm right to be concerned!)
So what I have is a very pretty NON-heat resistant trivet. That's okay. I still like it.
*Coaster rules:
1. A coaster must be absorbent so the sweaty iced tea glass does not form a liquid suction layer to said coaster, causing it to 'stick' to the bottom of the glass. Invariably if I leave the coaster 'attached' while drinking from the sweaty glass, the coaster will release, fall to my chest and spew condensation all over me at the same time the lump of fused ice cubes in the glass hits me in the nose. NOT good times.
2. Oh. I guess there is no #2. #1 is reason enough.
While I've been off work this week (nothing to worry about, let's just move on along), I've been reasearching and designing for specific shop-related needs.
We have what's called a "Block Challenge" each month, where we feature a line or combination of fabrics. We make a packet of four 14x11" fabrics plus one 14x22" fabric which our lovely customers purchase, take home and use to make one or two 12½" unfinished quilt blocks in the design/pattern of their choice. They then return the blocks to the shop, we put their name on the back & display the blocks. At the end of the month, we draw a name from the entries and whoever's name gets drawn wins ALL of the blocks. Cool, huh?
The thing is, we always have two to five packets left over at the end of the month (out of 24 or more, so we can't complain). But what to do with the 'leftovers' in such odd sizes? Well, here's what I came up with for our Fig Tree Mill House Inn packet from January:
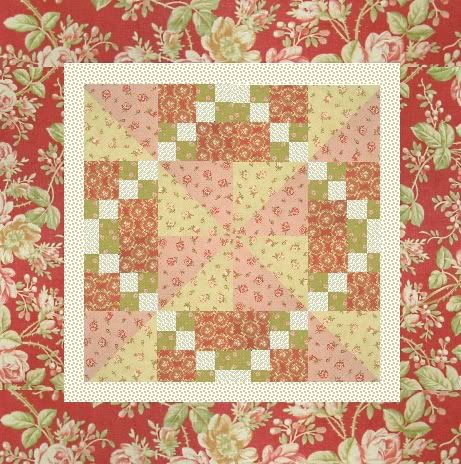 I give you "Millhouse Spin", a wallhanging or table topper pattern that finishes to about 22" square.
This uses the Block Challenge packet fabrics plus 1/8 yd. of a soft off-white.
Depending on how well it's received here and at the shop, I hope to share this pattern with you as a freebie sometime in the future.
(If you don't see it before school starts in the fall, remind me - I tend to forget things, yanno.)
Okay, you made it through yet another post, so here's what you're probably after:

A Maywood Studios "Rise 'N Shine" Sweet Sixteen collection!
This Sweet Sixteen collection includes (all?) 28 prints in "fat 16ths" (approx. 9x11" each). Here is an I-don't-know-how-long-it-will-be-valid link to Cotton Fields On-Line's listing of this fabric line so you can see how stinkin' cute the fabrics are.
But wait! There's more! Maywood Studios also published a free online pattern to use this Sweet Sixteen packet here: Cool Spools (it's a direct-to-pdf link, sorry!)

Looky at the cute chickens!
Leave a comment on this post before midnight Sunday, March 7 (this part's different than yesterday!) (California-time) for a chance to receive this S16 bundle. I'll do the random-number generator thing on Monday to choose a name from the entries.
The rest of the "rules" for this giveaway are the same as yesterday's rules, so I'm gonna copy them over to here:
For a second entry, blog about the little giveaway Part One then come back and leave me a comment that you did so. A link to your blog post would be handy (but not required)... who knows? Maybe you'll get some new visitors!
(Just a note) Blogger comments accept html code... here's what you need to put in to make a clickable link:
<a href="web address of my blog post.html">Name of my Blog Post</a>Aw, heck. How about another entry opportunity? Email a friend and tell them to come visit me. When your friend comments and says "Bertha sent me," (though I'd prefer them to include YOUR name)(unless you're Bertha. Then they can say "Bertha sent me.") both you AND your friend will each get an additional entry.
So, you're not in the U.S.? No problem. I don't mind shipping internationally!
That's it. For now.
I am having a blast meeting everyone, thank you ALL for your nice words and good wishes!! ♥
Labels: babble, craft, quilting
permalink 60 folks clicked here to comment
There Seems To Be a Theme Here
September 04, 2009 "What a very good idea," Susan said. "Now & Then" by Robert B. Parker ♦♦♦◊◊
As I sit at my computer I often glance over by my coffee cup and smile when I see this:
A tiny soft sculpture of a pot of African violets. I raise violets, you see, and though many of 'my' varieties are miniatures, this little sculpture is tiny in comparison.
(Pardon the blurry - getting BOTH hands to not shake at the same time is nigh onto impossible for me. Oh, and excuse me while I go put on another pot of coffee...)
 Made for me by The Girl, this little darling is just that - little and darling. The white blob you're seeing there is a chicken egg. (I was trying to come up with an international frame of reference!)
It might have originally been meant to be a pincushion, but I don't want to risk losing it in the disaster area that is my sewing closet. I'm perfectly happy to have it sit right here so I can enjoy it whenever I want to. Thank you, my dear firstborn.
Yesterday I stopped off at The Paisley Duck to pick up some binding fabric for a small quilt I'm making (yep, something else I haven't taken a picture of for the blog). While I was there, I snapped. I knew that Susie had the McKenna Ryan Coffee Classics patterns there for a reasonable price.
Well, Susie no longer has those patterns in her inventory.

It's okay. Ann said I should do it.
This year I have purchased more patterns (these bring me to 5) than I have in probably the previous five years. Being part of the pattern authoring process and needing to always come up with shop samples pretty much squashes the desire to spend $$ on someone else's patterns when I have problems keeping up with our own.
But it all started with Regina Grewe's Piling Up! pattern. You may recognize Regina's name and style from her Little Birds BOM earlier this year. Last year she also provided a woodland flowers BOM.
I am a fan of Regina's work and I'm grateful that she is so generous in sharing her free designs. When I saw "Piling Up!" I immediately loved it and knew I had to purchase it. Yes, I know I could probably draft the pattern myself, but that wasn't the point for me. The amount I paid for the e-pattern (which was more than reasonable) is nothing compared to the value of what she shares with the world for free.
Um. No, I haven't actually started sewing a "Piling Up!" quilt yet. I have A Plan that involves putting handles on the bowls, thereby making them into :gasp!: coffee cups. I'm working on coffee-themed quilt that will eventually hang on the wall in my kitchen and The Plan is to incorporate "Piling Up!" into that project. permalink 4 folks clicked here to comment
Not Just for Dishes
March 29, 2009 "Never," he said, with great force. "Blue Horizon" by Wilbur Smith ♦♦♦♦◊ Another in the offering of gifts to my mom!
This time it's her apron from Christmas. It was okay on Christmas, but the ties at the neck were kinda long and she commented that it would work just as well to remove the tie-ability and just make one loop at the neck.
Hmmm. She said it much more eloquently and succinctly.
So, instead of taking her gift home with her, she left it for me to modify. I removed one of the ties at the neck and attached velcro at the ends of the remaining tie and the corner of the bib.
 So, isn't this a nice apron? Can you tell what's 'special' about it?
 It was made from two dishtowels and a placemat! One towel was cut up for ties and pockets, the other used for the skirt. The placemat was cut (just a bit) and sewed on as the bib. Except for the ties and pockets, all of the edges are already finished! Woot!
And, I'm not giving anything really secret away here, but another cool thing? I got the towels and placemat from the Dollar Store. Three bucks for an apron! Seriously, why doesn't every one of my friends and family have ten of these??
Now, I'm sure you're wondering:
How on earth do you keep track of all of your wonderful aprons?
(Okay, so I only have three - for now - but still...)
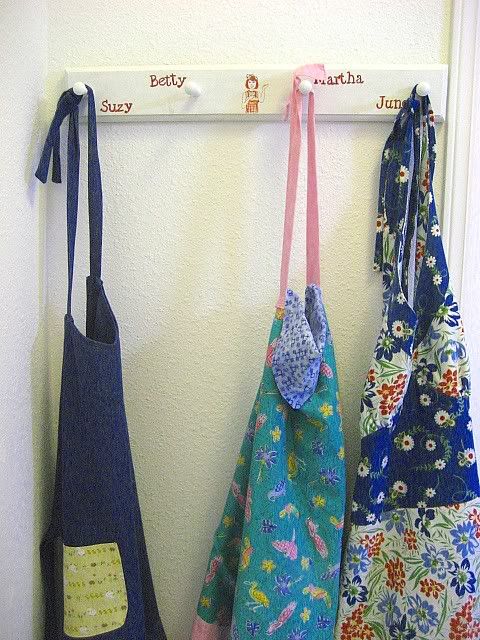
I put them on my custom-painted apron rack, that's how I keep track of them!
(If you click-to-big, you'll get an un-cropped picture)
 First I decided how I wanted to label my aprons. Then I decided on the font and size of my print and printed out a sheet of paper.
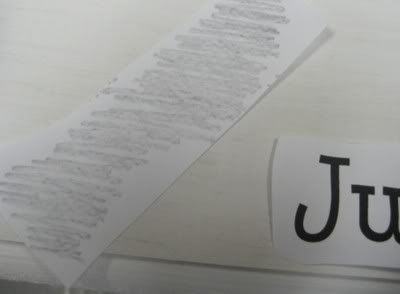 I scribbled on another piece of paper with a pencil...
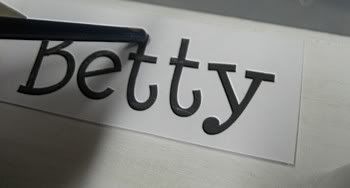 Then, using the end of a paintbrush, I put the printed letters over the scribble (scribble side to the wood) and rubbed (hard) over the letters.
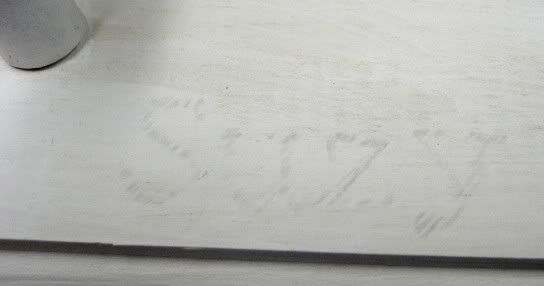 It's pretty faint, the transfer (might be easier to see if you biggify), but it's there enough for me to see.
 Paint over the transfer with acrylic paint (the inexpensive stuff you get from any craft store in the little bottles)...
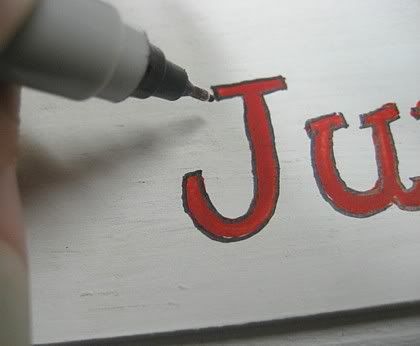 ...then outline it with a black fine-point Sharpie.
 After that I added other decorative touches, hung it on the wall after waiting a week for Mr. W. to do it, and now I'm enjoying the fruits of my labor! (I'm also grinning every time I pretend to be Suzy or Martha or Betty or June. :snort:)
Okay, one last thing in this chock fulla aprons post: Calamity Kim is celebrating the publication of one of her aprons in Apron o logy Magazine by having a giveaway! Click on over to Calamity Kim's Apron Celebration G*I*V*E*A*W*A*Y for your chance to win (not surprisingly) apron-related goodies! She's also including things that aren't obviously apron related, but pretty much everything is off the CUTE charts... (LOVE the miniature apron!). permalink 3 folks clicked here to comment
A February Project in February!
February 12, 2008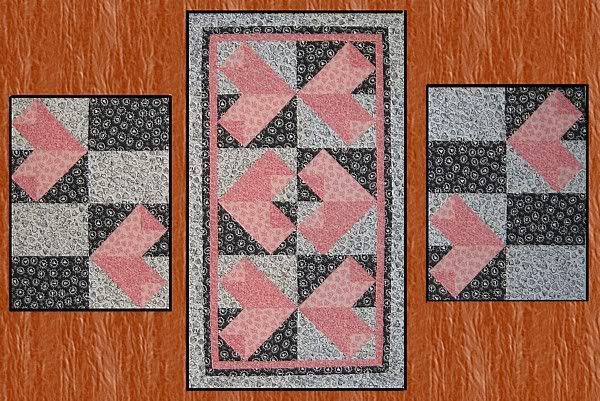
Click for Big(ger)
Here is my interpretation of the Simply Hearts tablerunner project (pdf is here). I mucked with the layout because, as written, the tablerunner is too narrow for my liking - but the pattern is totally cute! I've also figured out that if I don't actually cut and sew placemats at the same time as I'm building the runner, the placemats never get done.
Begun at our Woodland quilting get-together on Saturday, I finished piecing the set on Sunday, while I was switching back and forth between ibuprofen and naproxen, trying to find something that worked for my knee. (Both Monday and today, the pain woke me up - ::sigh::)
As for other creative endeavors? I'm trying to cycle through my projects/commitments. Sunday it was the tabletop stuff and designing quilting motifs for the stealth quilting project (SQP). Yesterday it was painting/shading on the SQP and making a prototype apron.
Today I basted part of the SQP, and I'm percolatin' another quilting motif. I might work on the 2nd prototype apron that I cut out yesterday.
Of course, it's Mr. W's birthday today, so I might not do any of the things that I currently have planned. permalink 1 folks clicked here to comment
Christmas Catch-Up #2
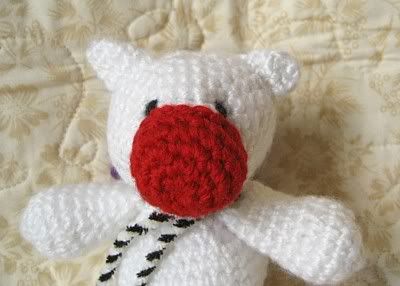
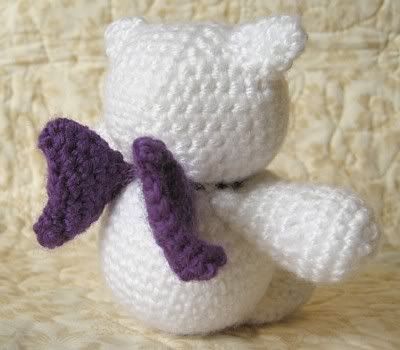
December 27, 2007 Here are pics of the critters that I crocheted for the California kids.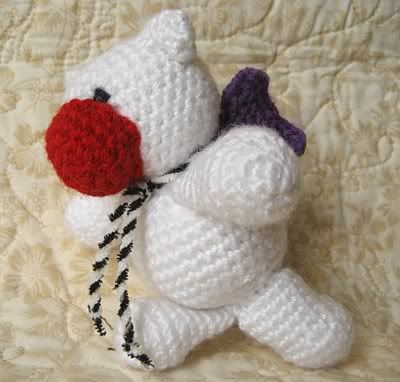
Yes, indeedy, folks - it's a Moogle. Well, actually I guess it's not, but it started out to be one! Pattern from Amy's Babies.
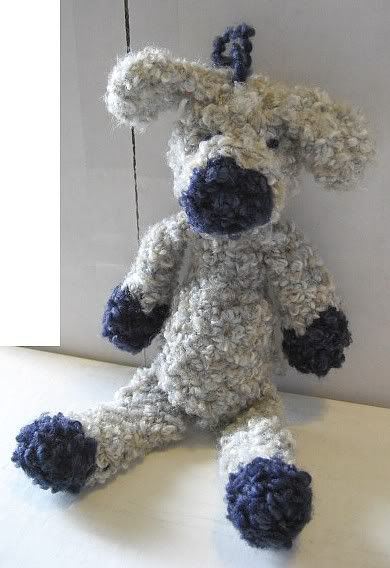
This here's "Lambchop". I thought it was a dog. Sharon thought it was a lamb. J2 thought it was a bear. No clue what Isaac thinks it is!
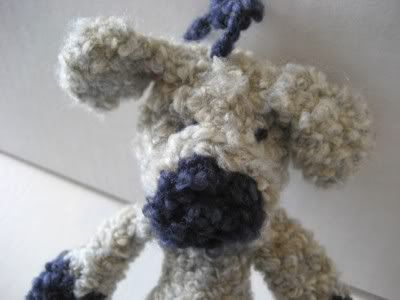
Awwww, what a face!
Pattern from Dortya over at the haakpoes blog (and yes, it's supposed to be a dog!). permalink 1 folks clicked here to comment
Yet Another Apron?
This one's for Lifesaver. I hear that he's a pretty good cook. Maybe he can bring himself to wear this? Dunno. Didn't hear how successful this was on Christmas morn.
 Apron pattern/inspiration from Betz White, here.
Complete with his very own Doodlebug... (kinda has a Jack Skellington thing going, doesn't it?) permalink 1 folks clicked here to comment
Christmas Catch-Up #1
Okay, lots to catch up on. Lots of pictures.Let's start with the gifts for the Grands that didn't get posted before Christmas (because I didn't have/take the time to do so):

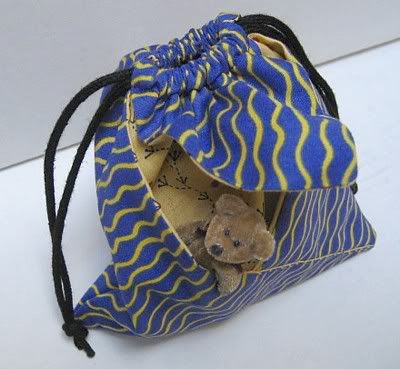
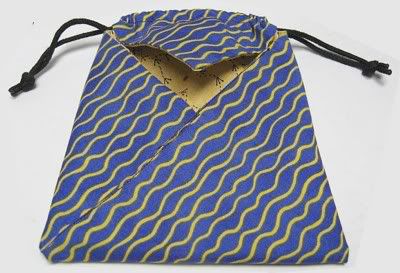 Isaac's Magic Bag, from My Little Mochi's origami pocket bag instructions.
I understand that boy-child just happened to get a magic kit for Christmas, so this worked out wonderfully. It has been dubbed The Wizard Bag. (How cool is that?)
These are way cool, it would be easy to really get carried away with them!
Oh - flattened, they're 6" square. Started with two 13.5" squares, sewed them together RST using about .25" seam allowance, turned, then followed the directions.
36" of cording took care of both bags.
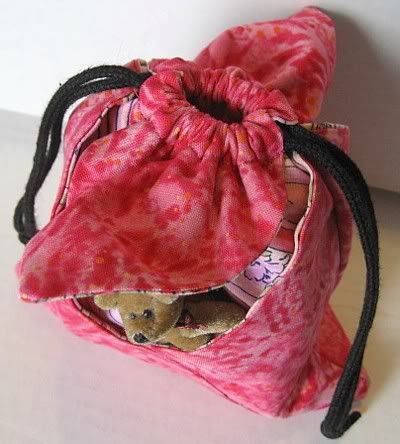

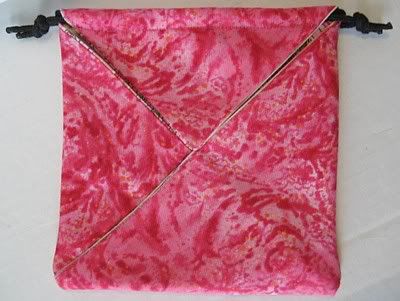 Ashley's Magic Bag - again, I hear it was a great hit!
 (Actually, we have "a thing" to go to today. I wonder if I can whip one out for the hostess???)
Next up is another apron (next post!).permalink 0 folks clicked here to comment
Super Cool Wallet
December 01, 2007 So, I got myself a wallet a while back. Woo. Not long after the purchase of said wallet, the grumbling began.While the wallet did what it was supposed to do - hold identification, cash and plastic, it was heavy. It wasn't leather or anything, just inexpensive microfibre, but with all of the windows and pockets and zipper and snap (and I'm just trying to come up with reasons that it would actually weigh as much as it does).
And you know what was the worst? A dollar bill wouldn't fit in the wallet without me folding it. What's the point? If I wanted to fold up my money, I'd just shove it in my jeans pocket and not bother carrying a separate accessory.
Enter the Super Cool Wallet. I ended up making two, because there were just a couple of things in the first one that I wanted to do better in the second one.
Specifically:
 The way that the inner pockets in the first wallet lined up made it difficult to see the cards in the back - and if the wallet was full up (all the cards and pictures and whatever), it was FAT.
 I made the pockets a bit deeper and moved the "back" pockets up about 1/2 inch in the second wallet, so I can see what's back there and it distributes the bulk a little easier.
I also added a hook and loop tab closure to both wallets - I couldn't wrap my brain around hook & loop tape on the inside of the wallet.


Wallet all filled up with more than I should really carry
There isn't a change pocket and there isn't a separate pocket so I can just flip it open to show my driver's license. Oh well. I got two 2-color wallets out of two fat quarters (with a little left over). It weighs less than half what the store-bought one weighed, is easier to deal with, and I don't have to fold the bills.
Things I'd change on the next one? I'd do more serious interfacing. The bill section is a bit floppy.

Look! Labels!
- Stitchery
- Quilting (of course!)
- Sewing (but not quilting)
- Aprons
- Babble (Includes Rants)
- Blogging Ups and Downs
- Charity Crafting
- General Crafting
- Adventures in Felting
- Holidaze
- The Ubiquitous "Intro"
- Knitting Machine Fun
- Knitting, Mostly by Hand

These Posts Might Change Your Life!
The Last Time I Was
CUTE
- Click the Pic to Visit My Blogger Profile
-


Where I Hang Out
- Visit Me at Google Plus!
-

Previous Posts
- I want to get back to blogging, really I do.But.Li...
- The Googs tells me that my Blogger blogs are gonna...
- A Very Expensive Bridge
- Dollies, Not Doilies
- The Mysterious Corn Dog
- My Kind of Doily
- Yummy-ish
- Why I Don't Make Quilts To Sell
- Sharp as a Marshmallow
- I Retreated


 people have looked at this blog - Cool!